kayak Basic Tutorial - Pengyi Version (Section 15 Heel hook rescue)
Heel hook rescue
There are numerous different methods to assist an unfortunate paddler back to kayak. The best technique depends on the situation. The technique that we are now about to learn is called "heel hook rescue". It is one of the most reliable techniques. And for example, if compared to more famous x-rescue, the heel hook requires a lot less upper body strength and flexibility.
Note that it might be a good idea to empty the kayak from most of the water before the paddler gets back in. The method for emptying the kayak is explained in tutorial Assisted kayak emptying. On the next pages we will see the heel hook rescue done step by step.
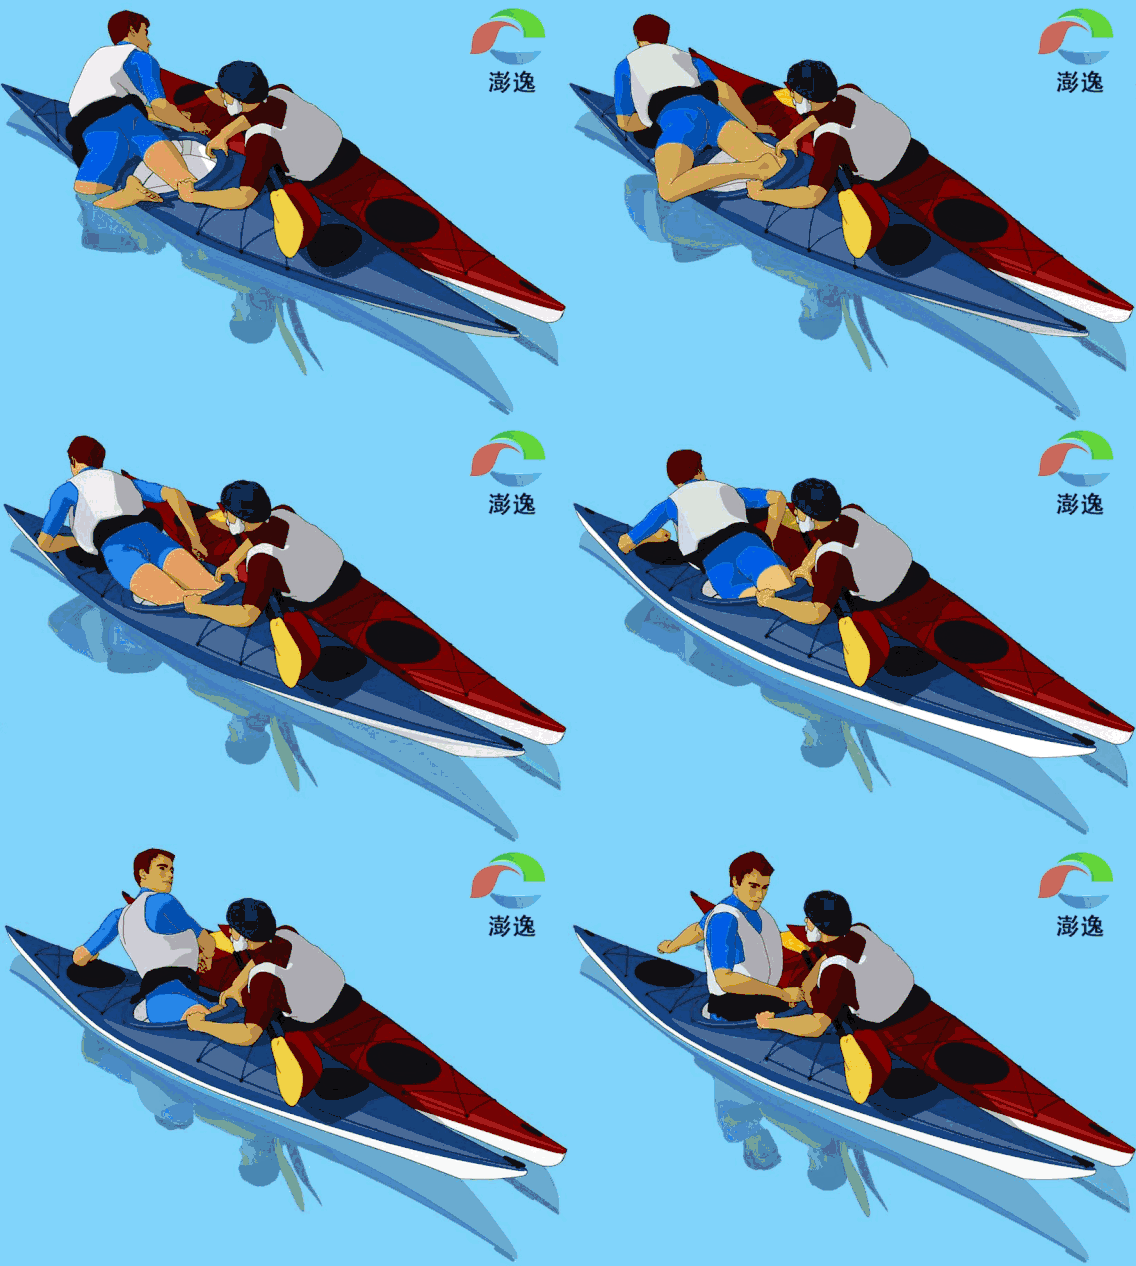
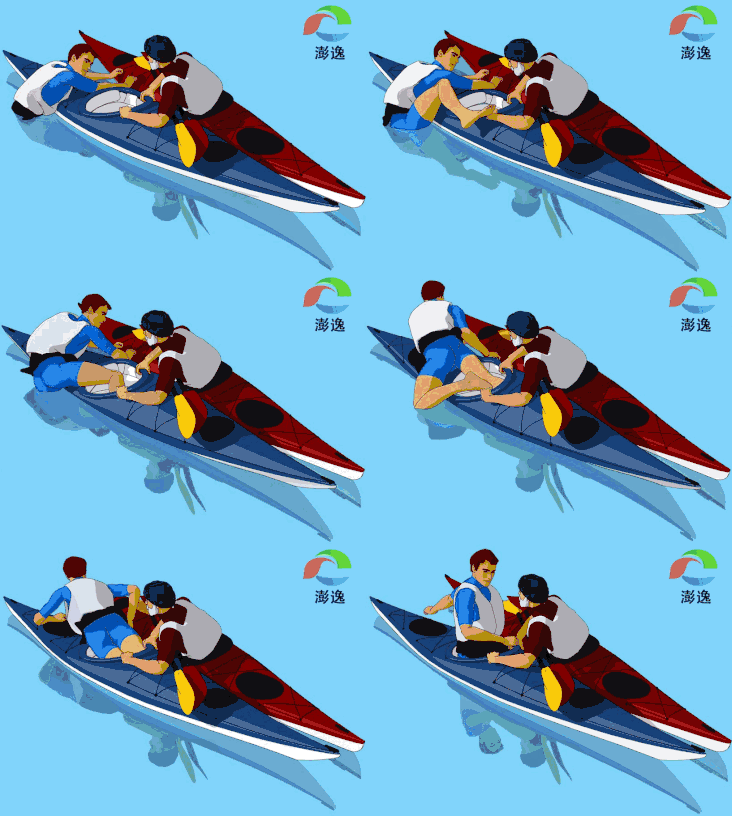
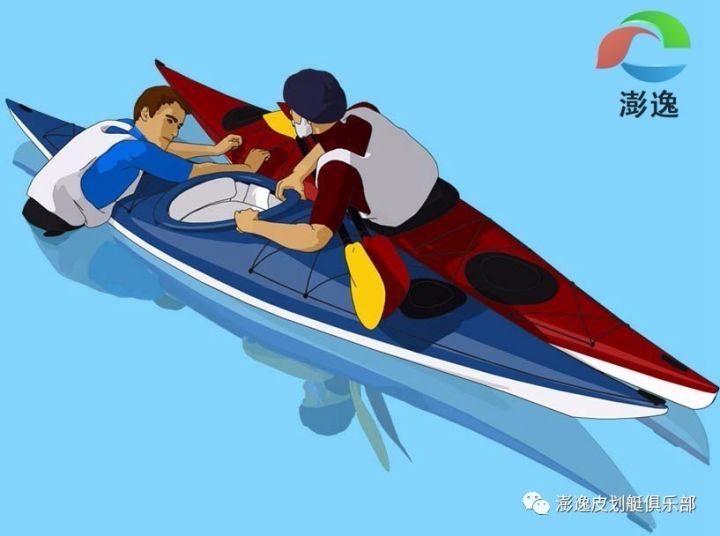
The helper places the kayak right next to the swimmer's kayak so that the kayaks bows point to opposite directions. Then the helper takes the swimmers paddle and puts both of the paddles on his lap. There they are safe and leave both hands free so that the helper can take a firm grip over the swimmer's kayak's cockpit coaming. The swimmer positions himself to the other side of his own kayak, right behind the cockpit.
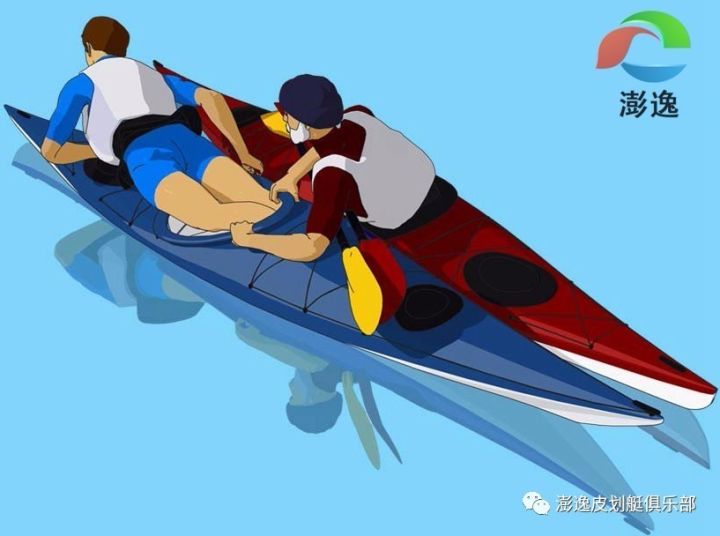
The swimmer places his arms on the rear deck of his own kayak and takes a grip from the helper's kayak, either from the deck ropes or from the cockpit coaming. Then the swimmer pulls his upper body on the rear deck and simultaneously swings the other leg inside the cockpit and hooks the heel inside the cockpit, right under the front deck.
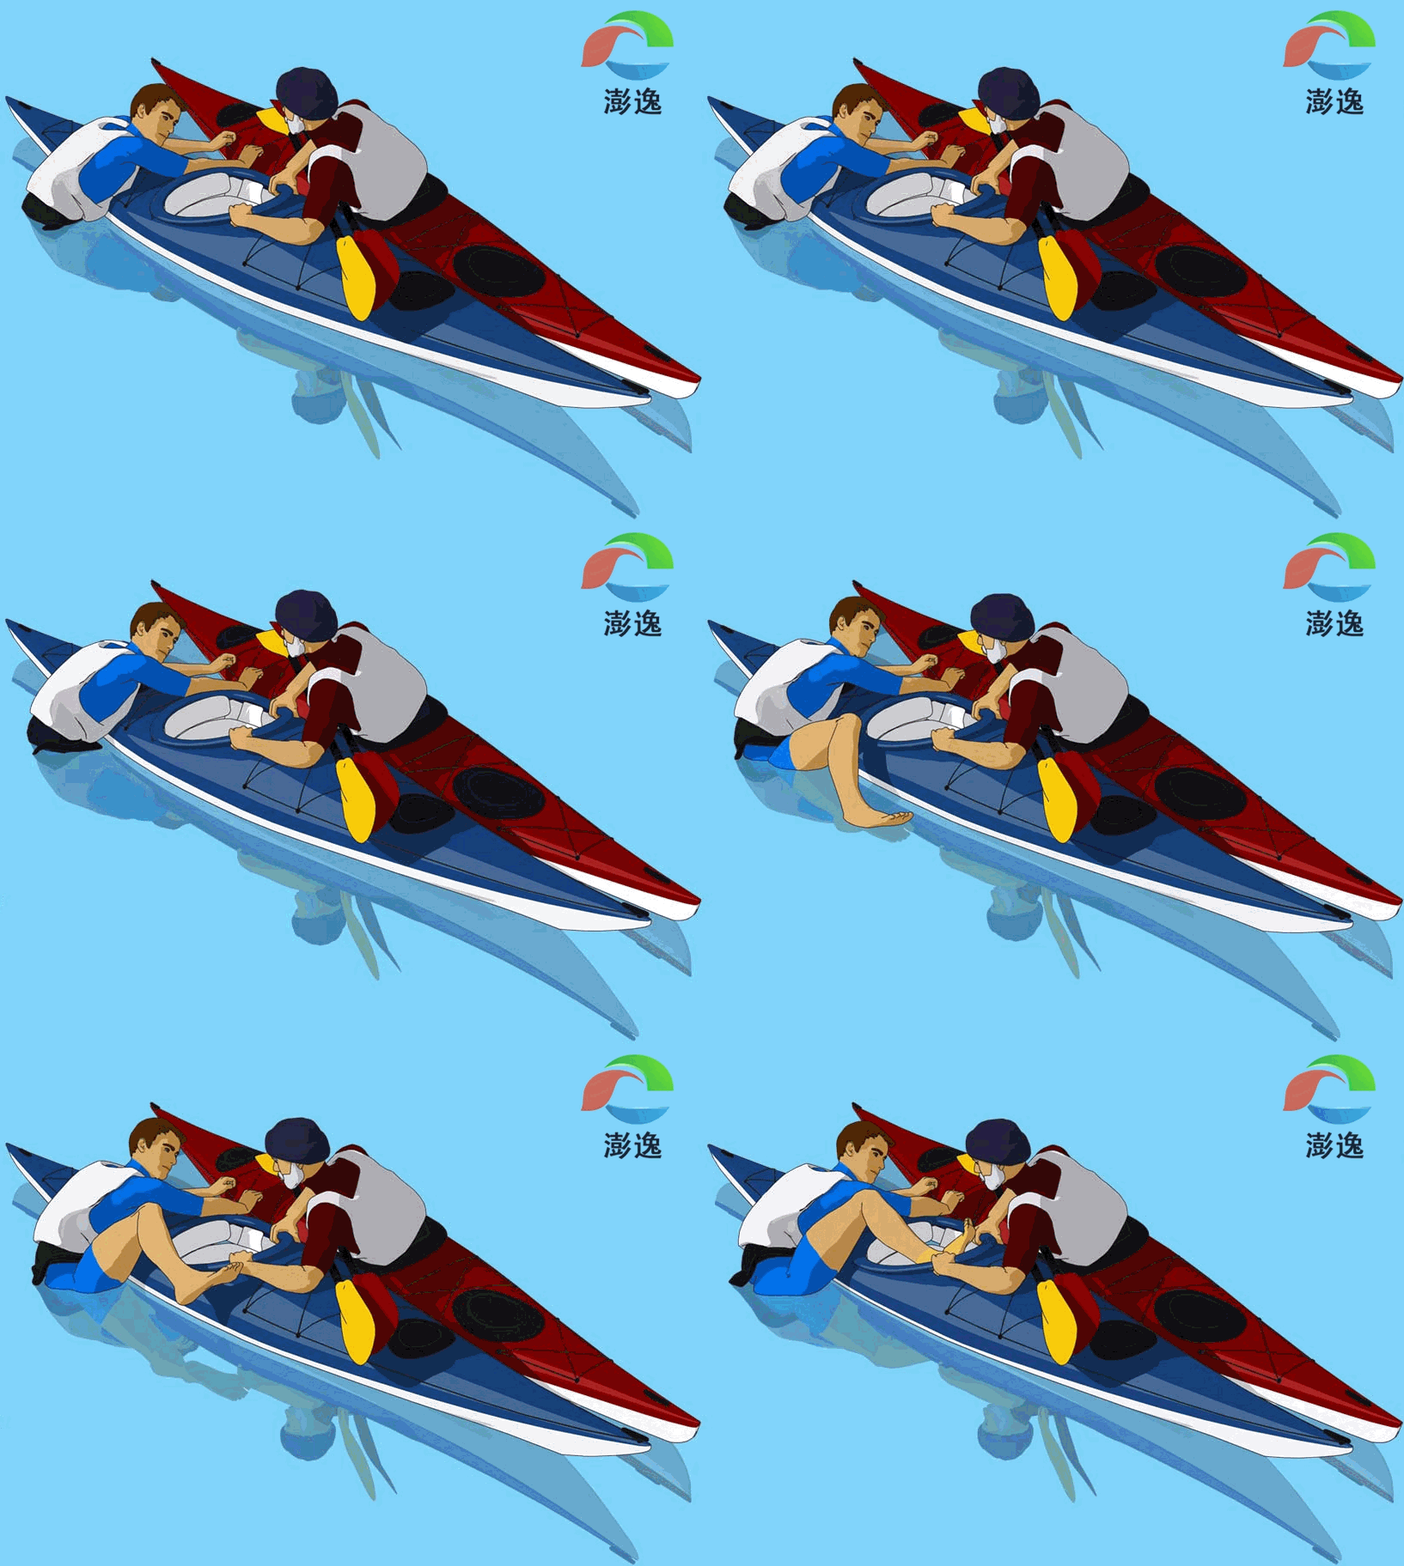
After the heel is hooked inside, it is fairly easy for the swimmer to pull himself on the rear deck by using his leg muscles. Remember that this phase may require a lot of strength from the helper, so swimmer should avoid doing any fast movements.
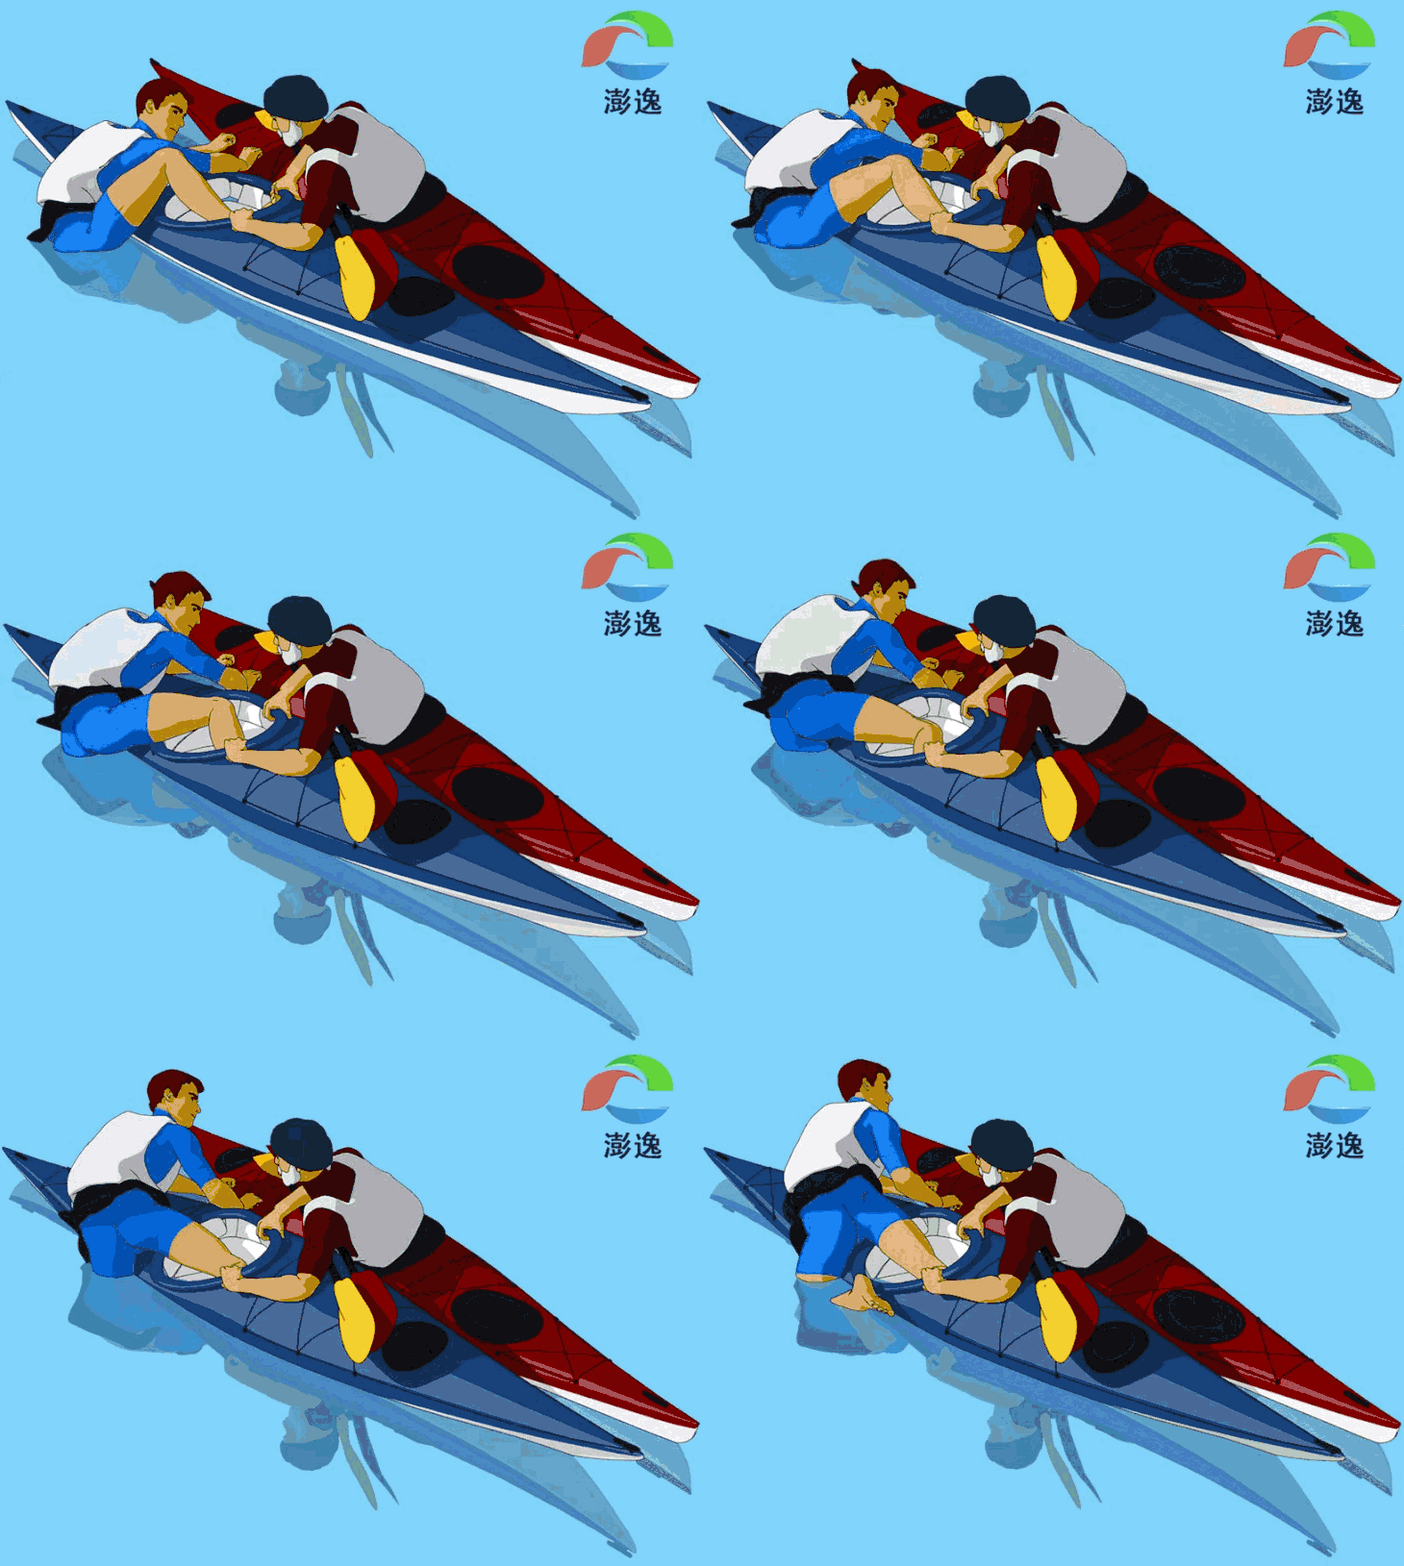
The swimmer moves his both legs to cockpit and carefully turns himself back to sitting position. The helper keeps the kayaks together until the swimmer gets his spray skirt secured and pumps the remaining water out with a water pump or bailer.
